Is It Better to Broil or Torch Crème Brûlée? Crème brûlée, the iconic French dessert, is loved for its creamy custard base and the satisfyingly crispy caramelized sugar topping. But the debate rages on: Is it better to broil or torch crème brûlée? Each method has its die-hard fans and distinct results. This article dives into both techniques, exploring their pros, cons, and best practices so you can decide the perfect way to achieve that delectable crunch.
Introduction
Crème brûlée is much more than a dessert; it’s a culinary masterpiece that balances textures and flavors. At the heart of its charm lies the caramelized sugar topping, achieved by either broiling or torching. But which method is better for crafting this golden layer of perfection?
We’ll break down each technique, starting with a deep dive into the dessert itself and its caramelization process. From there, we’ll explore broiling and torching step-by-step, analyze their advantages and limitations, and provide expert insights for perfect results every time.
Understanding Crème Brûlée and Its Caramelization Process
What is Crème Brûlée?
Crème brûlée, often called “burnt cream” in English, is a dessert steeped in history and elegance. Its origins can be traced to France, though variations exist in Spain (crema catalana) and England. At its core, this classic dessert features a silky custard base made from cream, egg yolks, and sugar, usually infused with vanilla.
The star of the show, however, is the caramelized sugar crust on top. It’s more than just a garnish—it provides a contrasting texture to the smooth custard and an irresistible toasty flavor.
The Science Behind Caramelizing Sugar
Sugar transforms when exposed to high heat, and the caramelization process gives crème brûlée its signature crunch and flavor. When sugar is heated to a certain point, it melts, browns, and releases new flavors due to the Maillard reaction.
This process amplifies the dessert’s complexity, offering notes of nuttiness, slight bitterness, and deep sweetness. Whether you broil or torch crème brûlée, the goal is to create that crisp, golden layer while keeping the custard beneath intact.
Stay tuned as we dive deeper into the two most popular methods of caramelizing crème brûlée, starting with broiling.
Broiling Crème Brûlée
How to Broil Crème Brûlée
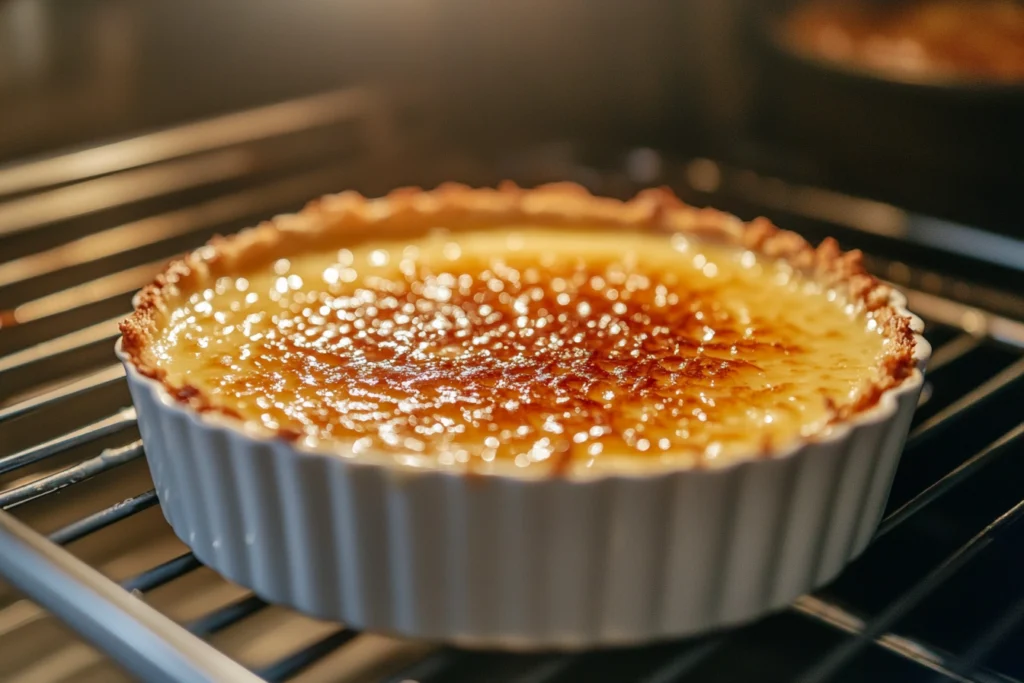
Broiling crème brûlée is a straightforward method that uses the oven’s built-in broiler to achieve a caramelized sugar crust. This approach is particularly convenient if you don’t have a culinary torch lying around. Here’s a step-by-step guide to doing it:
- Prepare Your Crème Brûlée
After the custard has chilled and set, sprinkle an even layer of granulated sugar on top of each serving. Using fine, white sugar is essential because it caramelizes more evenly than coarse alternatives. - Preheat the Broiler
Adjust your oven rack to the top position, placing it about 2-3 inches below the broiler element. Preheat the broiler on high for a few minutes to ensure even heat distribution. - Caramelize the Sugar
Place the ramekins on a baking tray and slide them under the broiler. Keep a close eye on them, as the sugar will begin to melt and caramelize within 2-4 minutes. Rotate the tray if needed to ensure even caramelization. - Cool and Serve
Once the sugar has browned to a perfect golden hue, remove the ramekins from the oven. Allow the caramelized layer to cool for a few minutes before serving.
Pros and Cons of Broiling
Every method has its upsides and downsides, and broiling is no exception. Here’s a closer look:
Pros
- Even Caramelization: The broiler covers a larger surface area, making it easier to achieve a uniform crust.
- Accessible: Since most ovens come with a broiler, you don’t need any additional tools.
- Scalable: Perfect for preparing multiple servings at once, especially for dinner parties.
Cons
- Less Precision: Controlling the level of caramelization can be tricky, and there’s a risk of burning the sugar.
- Heat Distribution Issues: Broilers can have uneven heat zones, potentially leading to an inconsistent crust.
- Slower Process: Broiling typically takes longer than using a torch, requiring patience and attention.
For those who prefer simplicity and already have an oven, broiling is a great way to caramelize crème brûlée. However, if precision and speed are your priorities, the torching method might be worth considering.

Torching Crème Brûlée
How to Torch Crème Brûlée
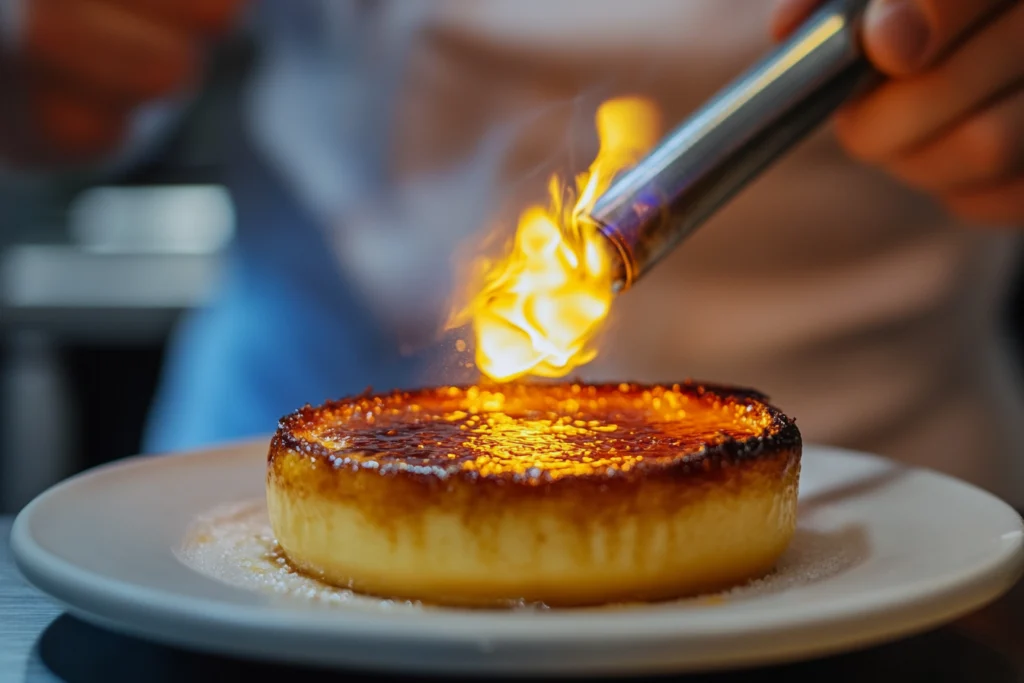
Using a culinary torch is the most popular method for caramelizing crème brûlée, offering precision and control that other methods can’t match. Here’s how to do it step by step:
- Sprinkle the Sugar
After your chilled custard is ready, evenly sprinkle a fine layer of sugar over the surface. Tilt the ramekin gently to ensure the sugar coats the entire top. This step ensures a smooth, crackable crust. - Ignite the Torch
Fill your culinary torch with butane, following the manufacturer’s instructions, and ignite it. Always keep safety in mind—work in a well-ventilated area and avoid flammable materials nearby. - Caramelize the Sugar
Keep the flame two to three inches above the coating of sugar. Move the flame in small, circular motions to heat the sugar evenly. Watch as it melts, bubbles, and gradually turns a beautiful golden-brown color. - Let It Cool
Allow the caramelized sugar crust to set for about a minute. This cooling period ensures the top hardens while the custard beneath stays cool and creamy.
Pros and Cons of Torching
Pros
- Precision: A culinary torch allows you to control the heat and caramelize exactly to your liking.
- Speed: Caramelizing takes less than a minute, making it faster than broiling.
- Aesthetic Appeal: The process creates a professional look, often preferred in high-end culinary presentations.
Cons
- Special Equipment Required: Not everyone owns a culinary torch, and purchasing one might feel like an extra expense.
- Risk of Burnt Spots: Holding the flame too close or too long in one area can cause uneven caramelization or burnt sugar.
- Learning Curve: For beginners, using a torch may feel intimidating at first.
Despite its slight learning curve, torching remains the preferred method among chefs and dessert enthusiasts for achieving a perfectly caramelized sugar crust. With some practice, it offers unmatched precision and aesthetic results.

Key Differences Between Broiling and Torching
Comparing Results: Texture, Flavor, and Aesthetics
When it comes to the end result, both broiling and torching can produce a beautiful caramelized crust, but subtle differences set them apart.
Texture
- Broiling: The heat from the broiler tends to create a slightly thicker and more uniform caramelized sugar layer. However, the crust can sometimes feel a bit harder due to prolonged exposure to heat.
- Torching: A torch delivers a delicate, glass-like crust that shatters effortlessly with a spoon, offering the classic crack sound that’s a hallmark of crème brûlée.
Flavor
- Broiling: The sugar develops a deeper, toastier flavor, but there’s a slight risk of bitterness if it stays under the broiler too long.
- Torching: With the precise control of a torch, you can caramelize the sugar to perfection, bringing out its rich, sweet, and nutty notes without overdoing it.
Aesthetics
- Broiling: While broiling caramelizes sugar evenly, it can sometimes result in a duller appearance with fewer variations in color.
- Torching: The torch allows for artistic freedom, creating intricate patterns of golden and amber hues that make the dessert visually stunning.
Efficiency and Convenience
The convenience of each method depends largely on your tools, skills, and kitchen setup.
- Broiling: Ideal for those preparing multiple servings at once, especially when hosting guests. Since most kitchens already have an oven, broiling is more accessible and doesn’t require additional equipment.
- Torching: If precision is your goal, a culinary torch is indispensable. It’s faster, more efficient for individual servings, and offers unparalleled control over caramelization.
The choice between broiling and torching often boils down to personal preferences. If you’re aiming for a more traditional aesthetic and quicker caramelization, the torch wins. However, broiling remains an excellent option for practicality and accessibility.
Which Method is Healthier?
Health Considerations in Caramelization
When caramelizing crème brûlée, the primary health considerations revolve around the chemical changes that occur when sugar is heated. While both broiling and torching methods achieve similar results, there are slight differences to keep in mind.
Potential Chemical Reactions
- Broiling: The extended exposure to high heat in a broiler may increase the risk of forming advanced glycation end-products (AGEs). These compounds are created when sugar and proteins react under heat, potentially contributing to inflammation when consumed in excess.
- Torching: Torching involves shorter heat exposure, which could minimize the formation of AGEs. However, over-torching or burning the sugar can also create potentially harmful compounds.
Calorie and Nutritional Impact
Caramelization itself doesn’t alter the calorie count significantly. However, the thickness of the sugar layer can vary:
- A thicker crust, which is more common with broiling, adds more sugar and calories.
- With torching, the control allows you to use less sugar, resulting in a lighter crust.
Environmental Considerations
From an environmental perspective, both methods have minor implications:
- Broiling uses more energy due to the oven’s prolonged heating time.
- Torching, while faster, relies on butane, a non-renewable resource.
Conclusion on Health
Neither method is inherently “healthier,” but torching might have a slight edge due to reduced heat exposure and better portion control. However, enjoying crème brûlée in moderation ensures that its impact on your health remains minimal, regardless of the method.
Expert Opinions on Broiling vs. Torching Crème Brûlée
What Do Professional Chefs Recommend?
Professional chefs around the world have strong preferences when it comes to caramelizing crème brûlée. Their choices often depend on the desired outcome and the tools they have on hand. Let’s take a closer look at their insights.
Why Chefs Favor Torching
- Precision and Control: Many chefs prefer the torch for its precision. Renowned pastry chefs often highlight how the torch allows them to caramelize sugar evenly without risking the custard underneath.
- Aesthetic Appeal: Chefs working in high-end kitchens emphasize that the torch creates an ideal caramelized layer with intricate golden-brown tones. It also offers the ability to make artistic patterns on the sugar.
- Quick and Efficient: For restaurants serving multiple desserts quickly, the torch saves time while delivering consistent results.
When Broiling is the Go-To Method
- Scaling Up: Some chefs recommend broiling when preparing crème brûlée for a large group. It allows them to caramelize several ramekins simultaneously, which is not practical with a torch.
- Home Kitchens: Chefs catering to home cooks often suggest broiling as a beginner-friendly option since most kitchens are already equipped with an oven.
Hybrid Approaches in Professional Kitchens
Interestingly, some chefs use a hybrid method—broiling for the initial caramelization and torching for the finishing touches. This combination ensures even browning with a polished final look.
Verdict from the Experts
While the majority lean toward torching for precision and aesthetics, broiling has its advantages for batch preparation and simplicity. Chefs agree that both methods, when done correctly, can produce an outstanding dessert. Ultimately, your choice depends on your tools, time, and personal preferences.
Practical Tips for Perfect Crème Brûlée Caramelization
Tips for Broiling Success
If you decide to broil your crème brûlée, there are a few practical steps to ensure the best results:
- Use the Right Rack Position
Always place your ramekins on the top oven rack, about 2-3 inches below the broiler. This positioning ensures even and efficient caramelization. - Preheat the Broiler
Preheating is crucial to avoid uneven heating. Turn on the broiler a few minutes before placing your ramekins in the oven. - Rotate the Tray
If your broiler has uneven heat spots, rotate the baking tray halfway through caramelizing to ensure all the ramekins get even heat. - Monitor Closely
Caramelization happens quickly under a broiler, often within 2-4 minutes. Stay close to avoid burning the sugar. - Use a Thin Sugar Layer
Spread a fine, even layer of sugar over the custard. A thicker layer can take too long to caramelize, increasing the risk of overheating the custard.
Tips for Using a Culinary Torch
For those opting for the torch method, follow these tips to achieve a professional finish:
- Keep the Flame Moving
Never hold the torch flame in one spot for too long. Use smooth, circular motions to heat the sugar evenly without scorching. - Start at the Edges
Begin caramelizing the sugar at the edges of the ramekin, gradually moving toward the center. This approach helps you control the process and avoid overburning any single area. - Adjust Flame Intensity
Most culinary torches allow you to control the flame size. Start with a medium flame and adjust as needed for even caramelization. - Use the Right Sugar
Fine granulated sugar caramelizes best. Brown sugar or powdered sugar can burn unevenly or create clumps. - Practice Makes Perfect
If you’re new to torching, practice on a test ramekin or even a spoonful of sugar before moving to your crème brûlée.
Extra Pro Tips
- For both methods, slightly chilling your custard before caramelizing helps prevent the heat from affecting the creamy texture below.
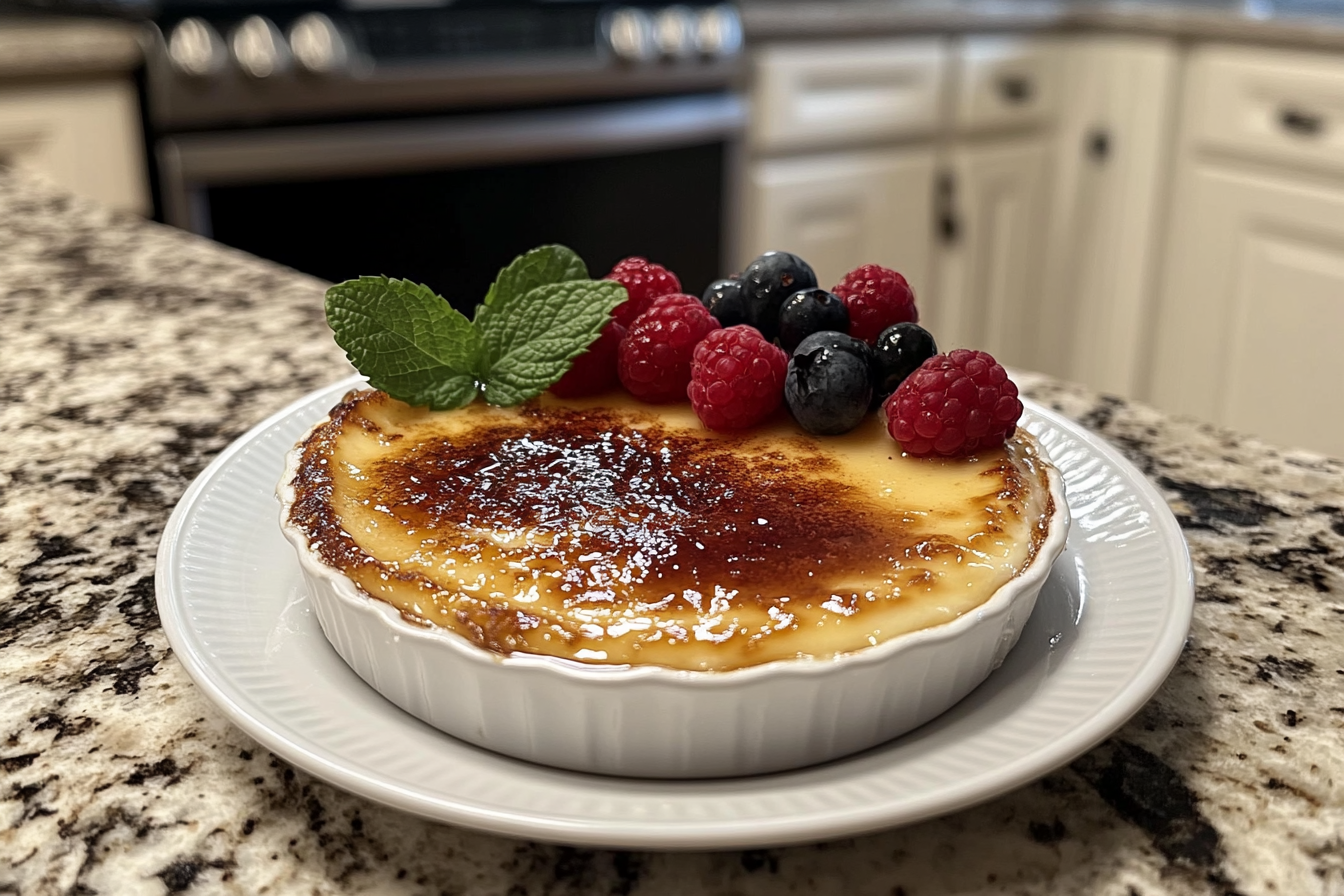
- Garnish with a touch of flair! After caramelizing, top with fresh berries or mint for an added visual and flavor boost.
With these practical tips in hand, you’re ready to create an exceptional crème brûlée, no matter which method you choose!
FAQs about Broiling and Torching Crème Brûlée
Is it possible to use a standard lighter in place of a cooking torch?
While it’s technically possible, a regular lighter is not recommended for caramelizing crème brûlée. The flame from a lighter is too small and inconsistent, which makes it difficult to evenly melt and caramelize the sugar. Additionally, prolonged use of a lighter can heat up the device, making it unsafe to handle.
What alternatives exist if I don’t have a broiler or torch?
If neither option is available, you can use a stovetop method. Heat a flat-bottomed metal spoon over a flame until it’s hot, then press it gently onto the sugar layer. This method takes longer and requires caution, but it can create a similar caramelized crust.
How long does it take to caramelize sugar under a broiler?
Typically, it takes 2-4 minutes to caramelize sugar under a broiler. However, this can vary depending on your oven’s broiler strength and the thickness of the sugar layer. Always monitor closely to avoid burning.
Is torching crème brûlée safe for beginners?
Yes, torching is safe for beginners if proper precautions are taken. Make sure to follow the torch’s instructions, work in a well-ventilated space, and keep flammable items away. Practice on a small sample before working on your actual dessert to build confidence.
How do I clean a broiled dish without damaging it?
Caramelized sugar can harden quickly, making cleanup a bit tricky. To clean broiled ramekins, soak them in warm water for 15-20 minutes to dissolve the sugar. Use a soft sponge to scrub gently, avoiding abrasive cleaners that can scratch the surface.
Does torching change the flavor more than broiling?
Torching can create a slightly smokier flavor due to the intense heat and direct flame. Broiling, on the other hand, produces a more uniform caramel flavor with less of the toasted edge. Both methods enhance the dessert’s taste, but the choice depends on your flavor preference.
Conclusion and Final Verdict
The Best Method for Caramelizing Crème Brûlée: Broil or Torch?
Both broiling and torching offer unique advantages, and the “best” method depends on your priorities and available tools.
- If you value precision, control, and a professional touch, torching is the clear winner. It allows for even caramelization, quick results, and stunning aesthetics.
- If you’re looking for a practical, scalable solution without additional equipment, broiling is a fantastic alternative. It’s accessible and works well for multiple servings.
Ultimately, whether you torch or broil, the magic lies in the crispy caramelized sugar that tops the creamy custard. Experiment with both methods and discover which one suits your style—and taste—best.
Enjoy your perfectly caramelized crème brûlée!


1 thought on “Is It Better to Broil or Torch Crème Brûlée? A Complete Comparison”